


DIY: Tissue Flowers!
Loves!
I apologize for getting to this a bit late today! I’ve been incredibly busy and dealing with a sick baby 🙁 . I don’t know if it’s allergies or a cold. What ever it may be, I’m praying to the good Lord above for healing! Today…
I bring to you!
TISSUE FLOWERS!
I love making my clients samples it helps with visualizing and I also believe it also brings in a level of trust in completing the project. So I thought I should share what I’ve been up to with a DIY. My client’s daughters birthday is coming up and I have the pleasure and honor to style her event ♥ I’m planning on adding Tissue paper party decor, and these tissue flowers are fabulous. This is such an easy DIY and you can really add it to any event you are planning to give it some punch! From Birthdays to baby showers including weddings. These can be incredibly dreamy or incredibly fun!

What you’ll need!
- Tissue Paper/recycled tissue paper 🙂
- Scissors
- Ruler
- Stapler
- Stick or rod for stem
- Pencil
- Glue Gun & Glue Sticks
- Fabric scraps (Optional)
- Spaghetti Jar/Container
[dropcap]1.[/dropcap]Depending on how many fabric flowers you are making and how full you want them, will add to how many sheets you’ll need. I use about 1 sheet for each flower and a third of a sheet if I want to add another color or have an ombre effect.
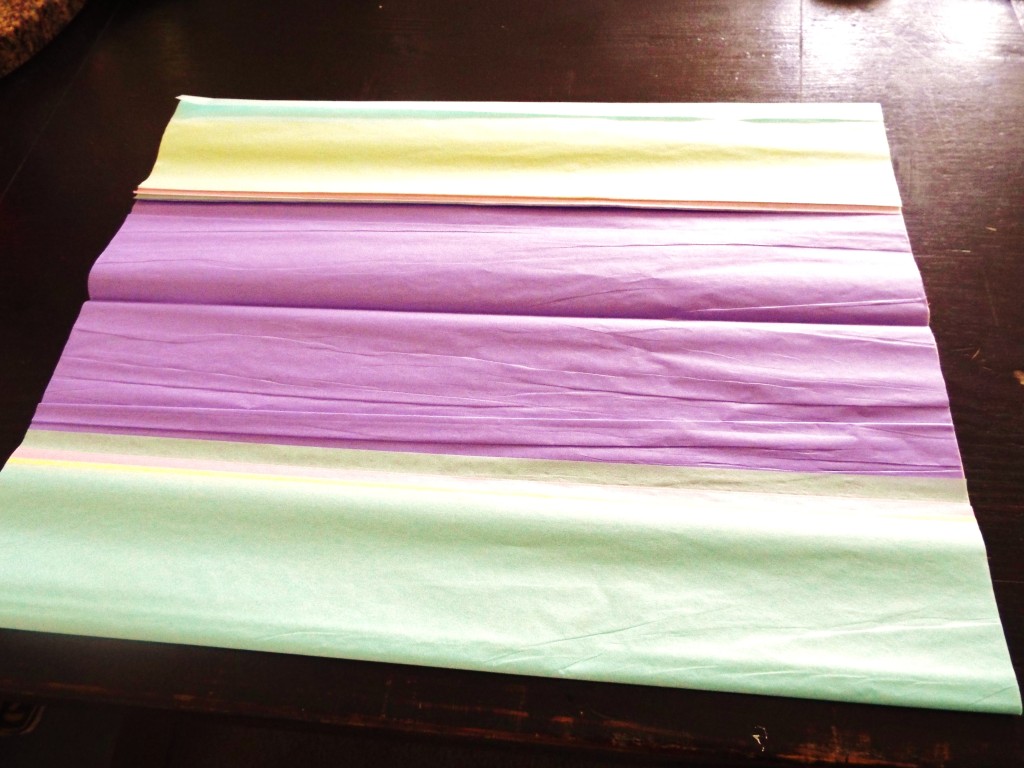 [dropcap]2.[/dropcap]Fold the sheet(s) until you get about a small square or the size you would like the flower to resemble, you will also be cutting around the sheets, make sure to take that into consideration.
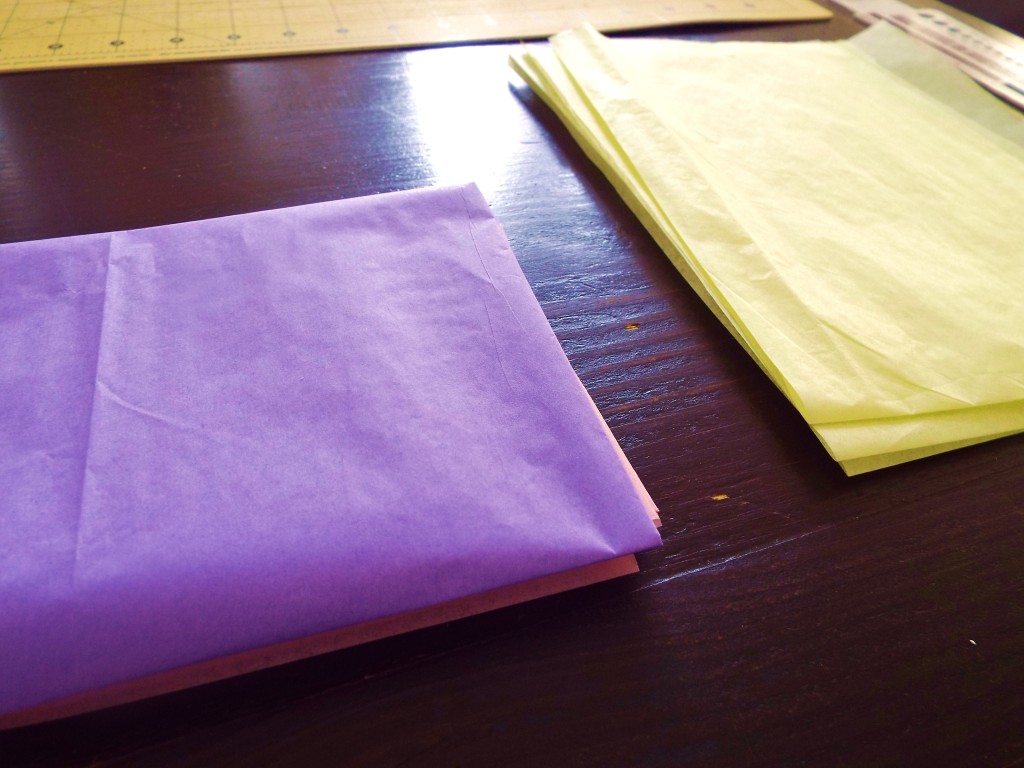 [dropcap]3.[/dropcap]Once you fold each sheet staple them together. If you are going for a variation of colors make sure you also staple those sheet squares as well.
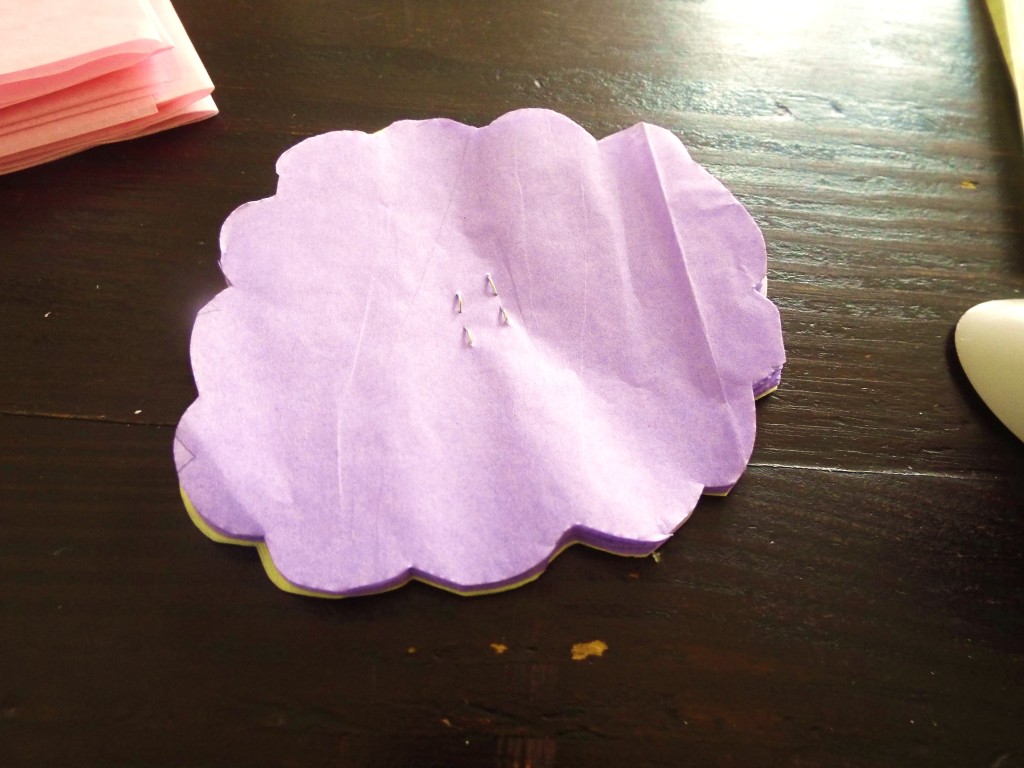 [dropcap]4.[/dropcap]Next you will cut around in a scalloped edge to soften up the flower.
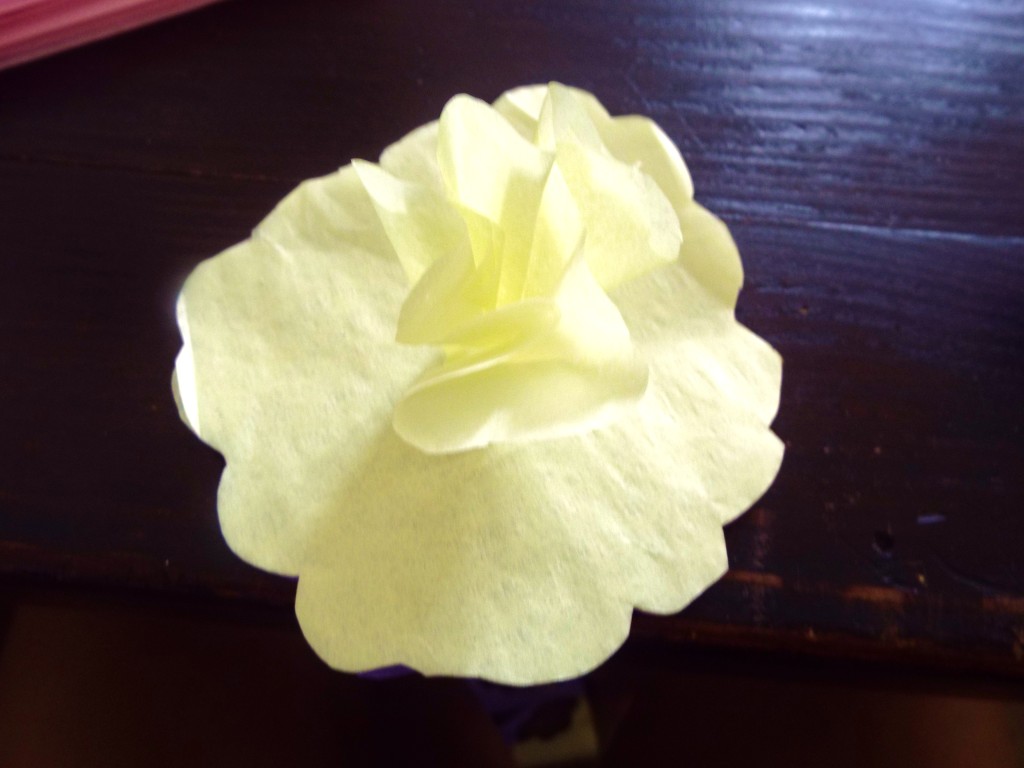 [dropcap]5.[/dropcap]After you staple them together and cut around, fold each sheet together one by one towards the center.
After you have done that with each sheet,
 [dropcap]6.[/dropcap]Next you will start to open each sheet up to the desired bloom effect.
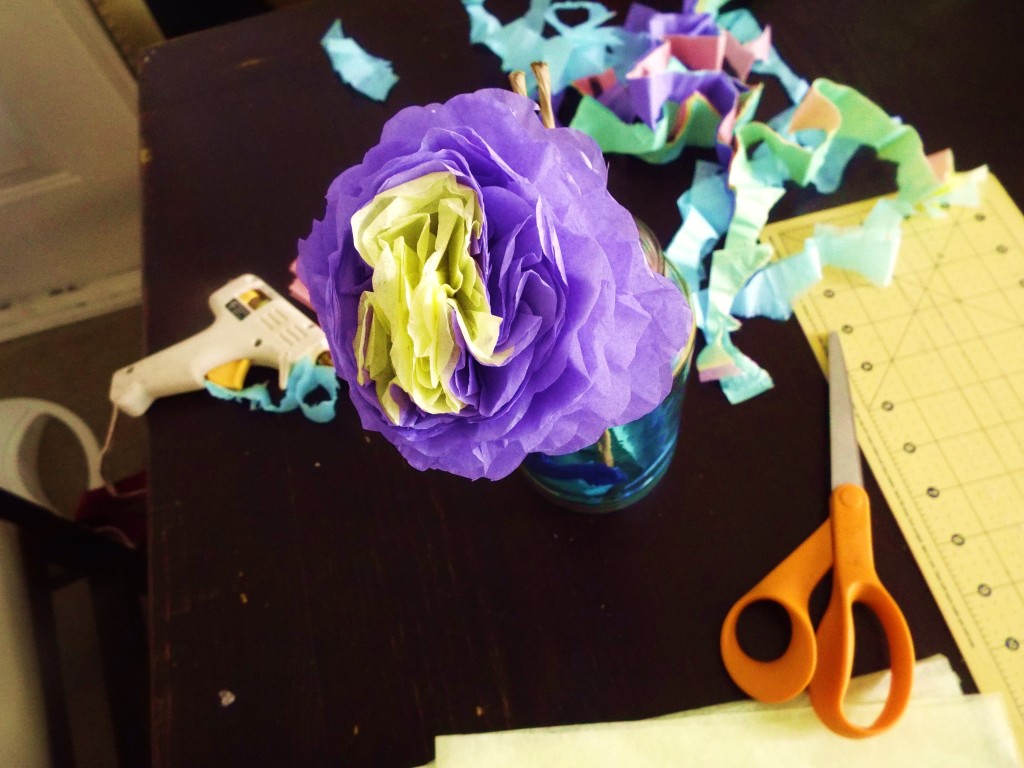
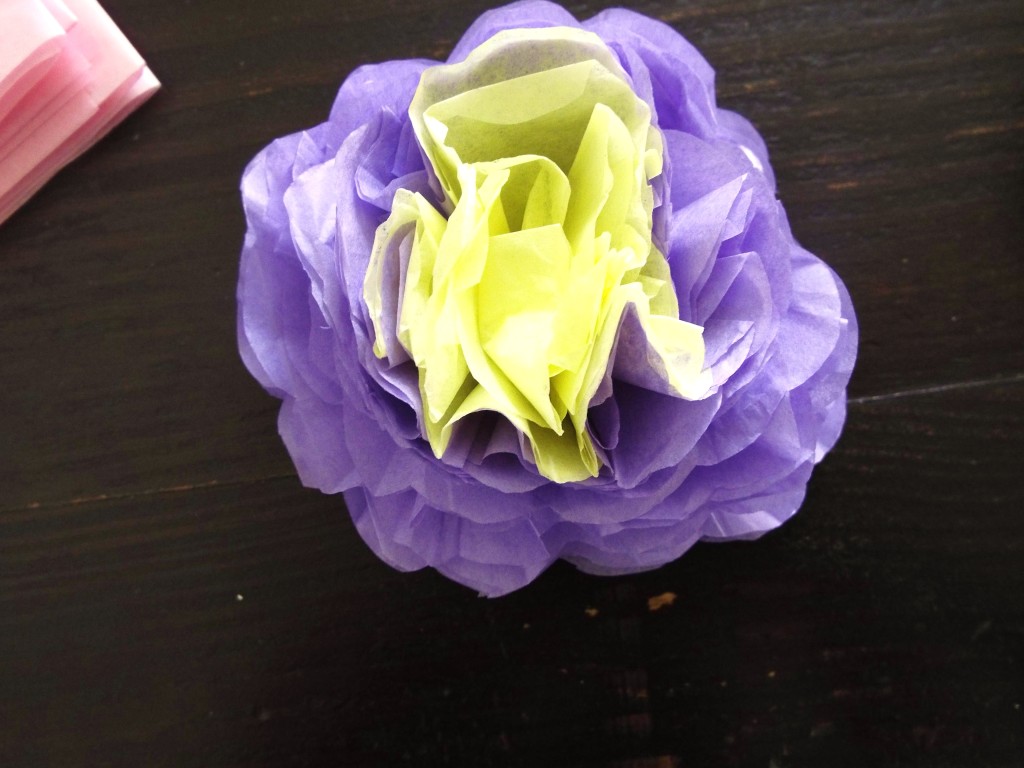 [dropcap]7.[/dropcap]Get your stem and hot glue gun it into place. You can also use the extra sheet cut outs for some added cuteness, or add green for a leafy effect, and wah-la, you have your blooming tissue flowers.
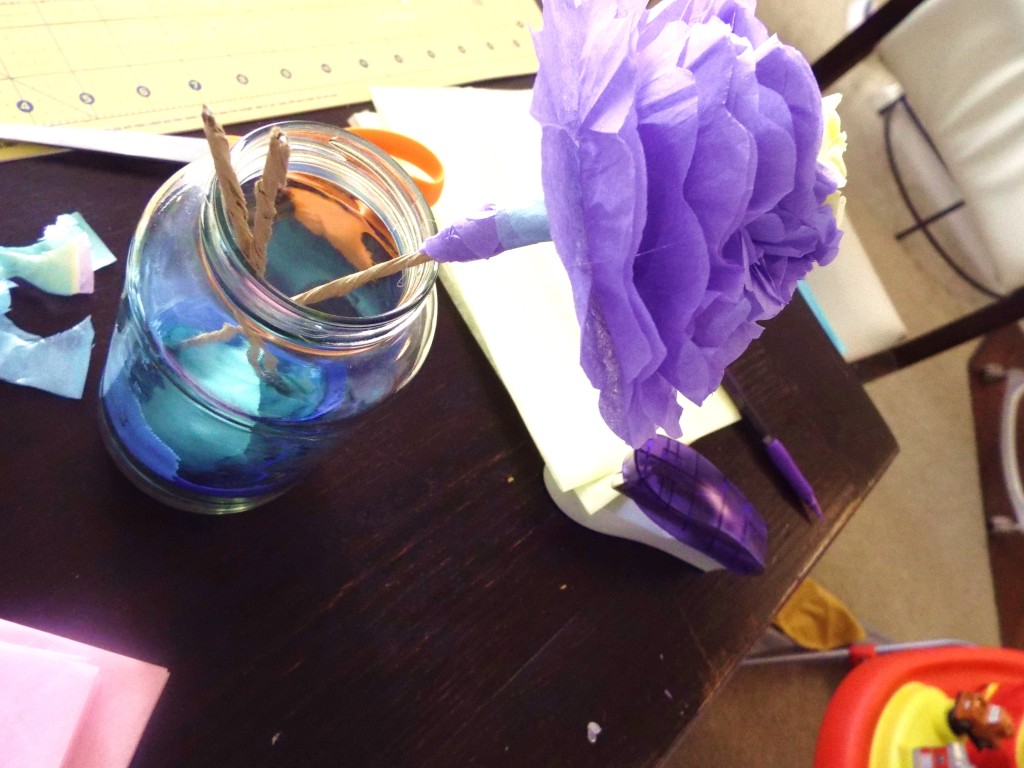
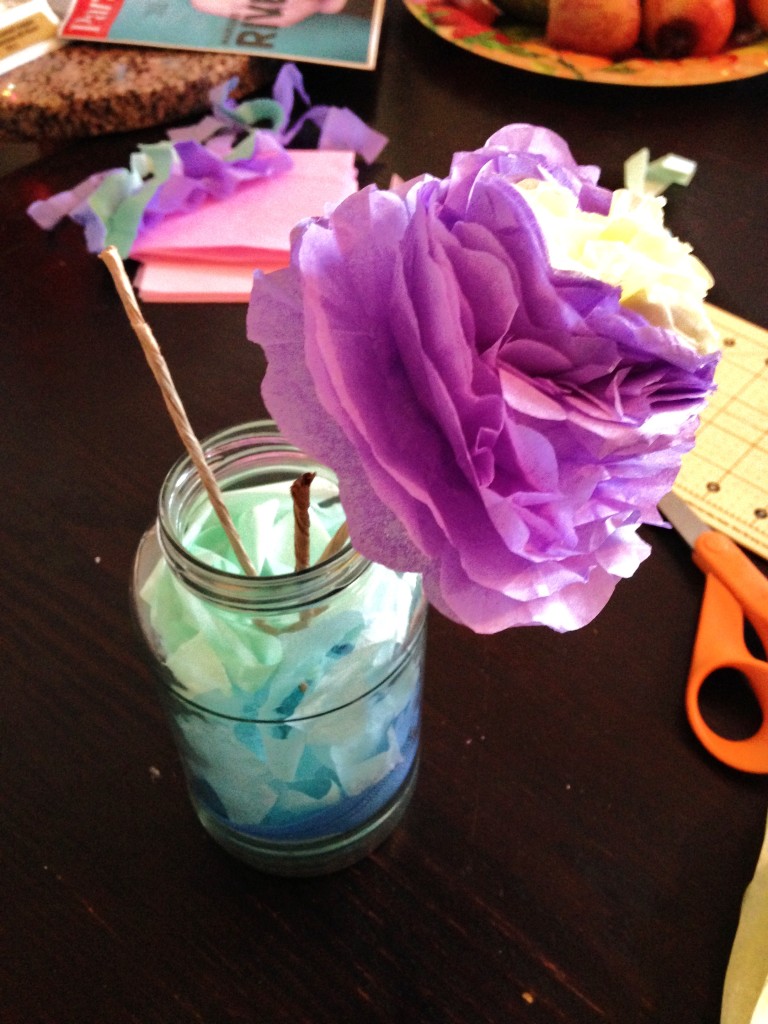 I love to use as much of my materials as possible with minimal to 0 waste and in this case I love using spaghetti jars and adding the extra tissue that has been left over to fill the jars you can also use scrap fabrics. Truly brings an added bonus to the look of your flowers.

I hope you Enjoyed! Are you planning on using this DIY for your next event? Have you used tissue paper as a craft DIY? I’d love to know, add it to the comments and share your experiences ♥
xoxo
Leave a Reply to Stacy Griffin Harper Cancel reply

Join the blog cure and not only have a stunning website you can't break but know exactly what to write that people will actually read.
If you’re ready to step into visibility with clarity, strategy & confidence… you’re in the right place.
Get Access
")
This is my tried and true method, systems and all the Goods to get your podcast up and running all in one Trello Board!
Get Access
")
Only available inside the Society. Learn how to grow your email list and business with a Bundle. Plan and Launch your bundle in 90 Days!
Get Access
self paced
Courses
Available
Browse courses

THE STEPHANIE
BLACK FRIDAY


$197
$350
buy now
more info
view demo
view demo
THE CAMILLE
THE COURTNEY


$97
$97
more info
buy now
view demo
view demo
If you’ve been craving consistency, confidence, and a deeper connection with God as you grow your business, this challenge is your doorway into a fresh start. For 30 days, you’ll receive gentle guidance, daily encouragement, and Christ-centered prompts that help you show up with purpose—without pressure or overwhelm.
30-Day Visibility & Grace Challenge
30 days of Grace
")
join the challenge


I am excited to see pictures from the party! Please make sure to post the styling for the event!
Stacy
http://www.anygirlcandoit.com
Yes! Will do ♥ I’m also very excited. There will also be a photo booth and a tent! 😀
[…] Setting up a perfectly balanced table of goodies is easier then meets the eye. A great way to dress up that table is through tissue flowers! I have a great DIY on how to make these gorgeous tissue flowers that you can use as cake decorations, table toppers and more! Be as creative as you want to be, you can catch this easy DIY over at my blog HERE. […]